nanohenry:~$ whoami
Henri
nanohenry:~$ uptime
20 years
nanohenry:~$ man henri
Programmer and digital inventor with a passion in cybersecurity
nanohenry:~$ service life status
Studying Quantum Technology at Aalto University
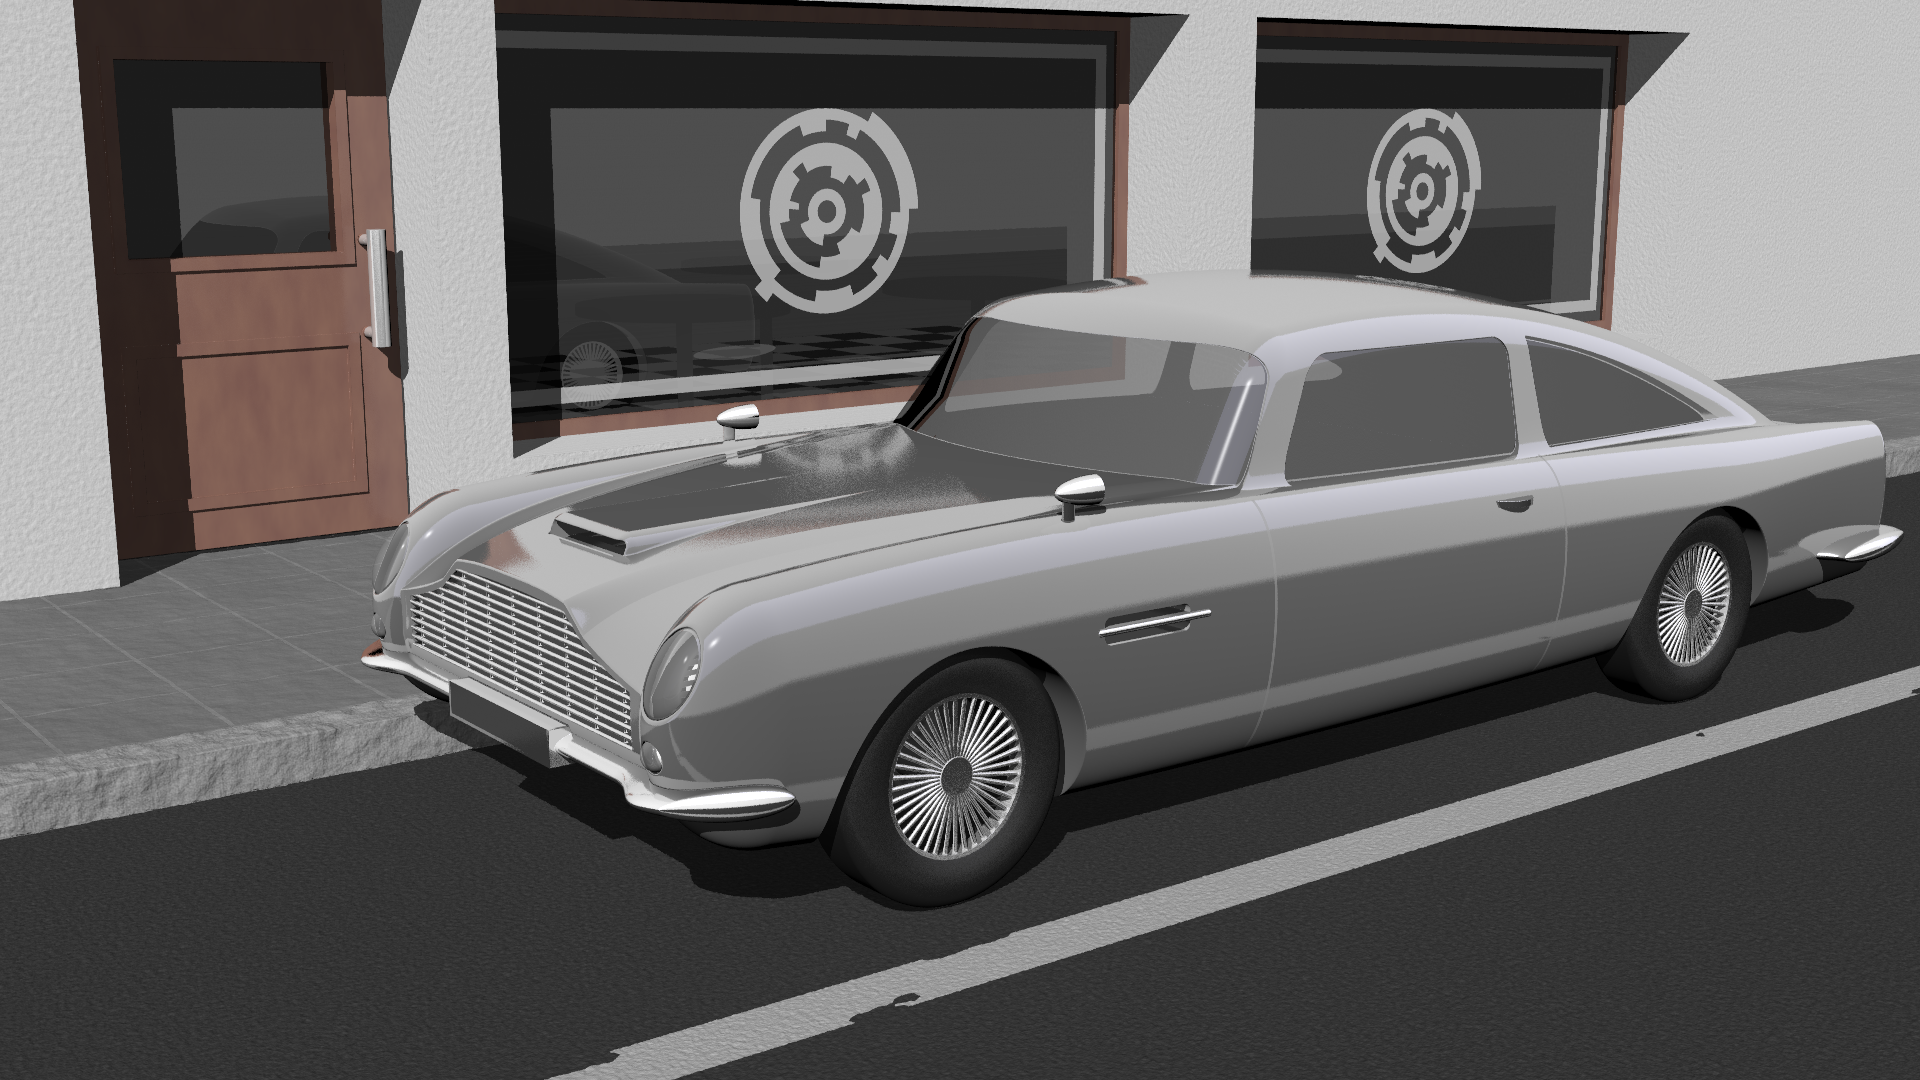
The World is not Enough
My 4K executable graphics entry to Revision 2021
The image
Background
After my successful participation in Revision 2020, I wanted to make something a bit fancier than what I had submitted previously. I began working on a small-ish production with OpenGL and lots of (fragment) shader code and got something ready for Revision 2021. I was happy with it, but I still had two weeks of time left before the demoparty and wanted to get something else going as well. So I took my tiny executable setup, threw out all the real-time frame loops, and built an image renderer. Now I just needed something to render with it.
I spent a while looking at practically everything around me and thinking about how I could compactly and efficiently render things. My first idea was to take some orb-like object, like a smooth stone, which could be represented as a stretched and bent sphere. That could have then been rendered with mirrors around it for fancy effect. However, that was a bit boring, and I would have had to come up with the perfect surface material shading to make it look good.
Then I saw the toy model of the famous Aston Martin DB5 from James Bond that I had on my desk. I admit that the shape was quite complex, and car paint is not easy to render in just 4 kilobytes, but I really wanted to try.
Modeling the vehicle
I found this image on the internet to be a useful reference:
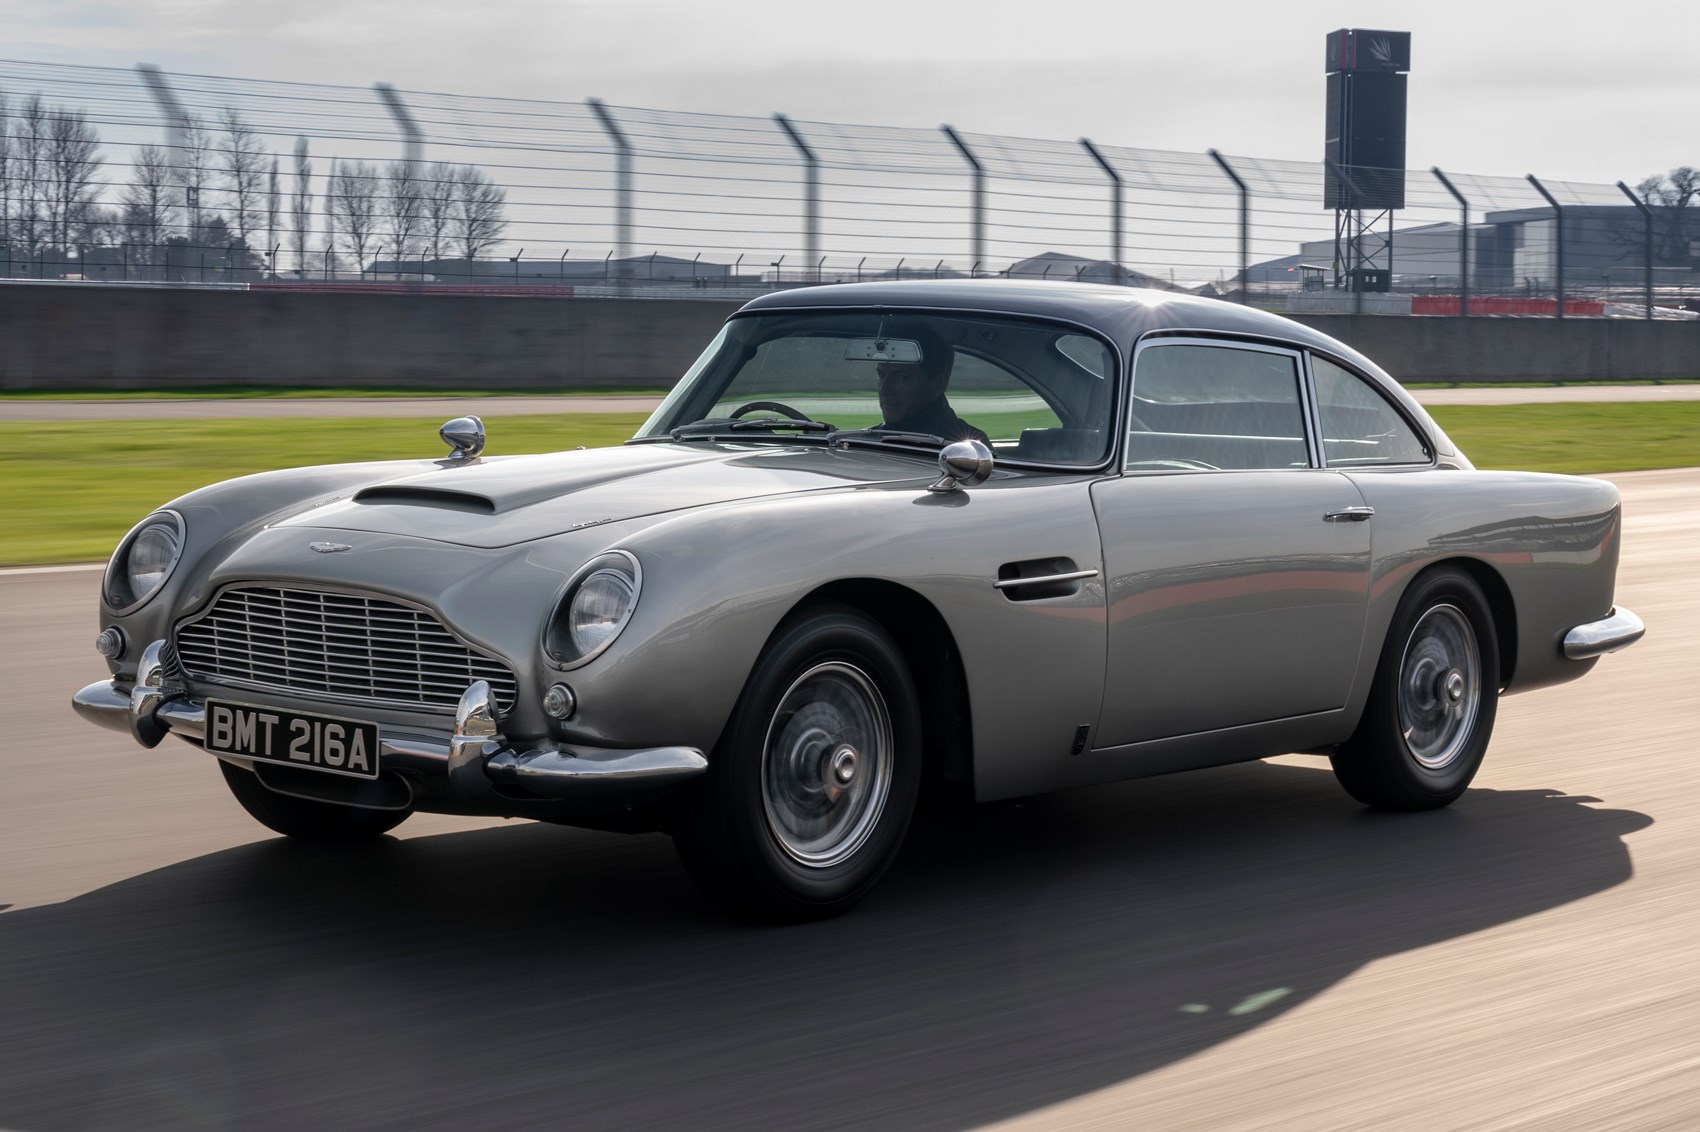
In my head, the vehicle's body could be divided into three main parts: the middle, the sides, and the roof. Of course it also has wheels, but those are fairly simple in shape and so they weren't of much concern at first. And since this was only a still image from the outside of the car, I didn't care about any of the internals.
I wasn't modeling with traditional polygons, so I couldn't simply open Blender and throw around some vertices. Instead, I was working with raymarched signed distance functions (or SDFs). In short, an SDF is a function that evaluates a point's distance from a surface, and thus implicitly defines the surface's shape — the edge lies wherever the function's value is zero. A very simple example of an SDF would be a sphere:
float sphere_sdf(vec3 point) {
    return distance(point, sphere_center) - sphere_radius;
}
Read more on SDFs on Inigo Quilez' site. He has an extensive list of articles on what SDFs are, some common shapes, and useful transformations on them.
With the above in mind, we can now model the car. First, the middle piece. With the sides removed, I thought that it would look like a stretched cylinder on its side with the top and bottom facing the car's doors.
Coding this is simple: take the SDF for a cylinder from the link above, scale one axis of the input by some value, pass the transformed point to the SDF, and return the value from the function. In fact, here is the relevant code in the massive fragment shader that renders the car (taken directly from the original source, with some edits for readability):
float sdCylinder(vec3 p, float r, float h) {
    vec2 d = abs(vec2(length(p.xz), p.y)) - vec2(h, r);
    return min(max(d.x, d.y), 0) + length(max(d, 0));
}
vec3 curveBody(vec3 p) {
    // *major* snip

    return p * vec3(0.13, 1.1, 1);
}
float sdCarBody(vec3 p) {
    // snip

    float s = sdCylinder(curveBody(p - vec3(-0.52, -0.05, 0)).xzy, 1.6, 0.75) - 0.005;

    // snip
}
What's going on here? (Other than the first function — that's from IQ's site above. Full credits to him.)
Firstly, the car is oriented to face the positive $x$-axis.
Secondly, the effect of a transformation on the surface is inversed: if you move the input in one direction, the surface moves in the other. Similarly, to stretch the surface, the input has to be squished. That's what 0.13 is there for in the second function. It squishes the point on the $x$-axis by a factor of $0.13$, or stretches the surface on that axis by its reciprocal, $\approx7.7$. The other axes stay relatively untouched, with the $y$-axis receiving a mild 1.1x scaling. I think I added it during the final touches to make it look just a bit better.
There are some other tricks being used here. To set the origin or center of a shape, one can either use a "special" SDF that accepts the center coordinates, or just shift the whole world and use an SDF that is centered around the origin. The latter is often easier. To shift the world, the input point has to be shifted in the opposite direction. p - vec3(-0.52, -0.05, 0) shifts the center to $(-0.52, -0.05, 0)$, which means slightly towards the back of the car and a tiny bit towards the ground. At this point I should probably mention that the units here roughly correspond to meters.
Another trick is rotation by swizzling. Since the cylinder SDF is specifically for an upwards cylinder, it had to be rotated onto its side first. This could be done by multiplying the input point with a $90^\circ$ rotation matrix, but if you work the matrix out, it would only have ones and zeroes. In fact, it would have exactly one one per row, or in other words, it would be a "shuffled" identity matrix. Specifically, it is shuffled so that it effectively swaps the $y$- and $z$-axis (assuming that it rotates around the $x$-axis). GLSL has a tool for these kinds of transformations, called swizzling, and basically it lets the programmer reorganise vectors on the fly. For example, to reverse a three-component color vector, which could normally be accessed with color_vector.rgb, one can write color_vector.bgr. Now, to rotate the input point by $90^\circ$ (i.e. to swap the $y$- and $z$-axis), a .xzy "swizzle mask" can be used. And that's exactly what's being done in the third function. Note that it's actually used to modify the output of a function, but the effect is the same.
TODO: TO BE CONTINUED